Steam-Baked Dinner Rolls

Louiie Victa
September 7, 2023
There’s nothing quite like fresh baked dinner rolls to accompany a weeknight meal. With the addition of steam in the Anova Precision Oven, this recipe produces a pillowy soft, moist, slightly sweet, and buttery roll that is very easy to make.
Notes: If you’d like, you can proof the dough in the Anova Precision Oven. Turn off Sous Vide Mode and set the oven temperature to 77°F (25°C) with 10% steam and rear heat. Keep an eye on the dough as it will rise more quickly in the oven than on the counter at room temperature.
After further testing, this recipe has been modified to increase the proofing times in steps 3 and 4.
Serves
6
Prep Time
03:00
Cook Time
00:15

3.86 (7)
4096
Ingredients
3 cups (420g)
all-purpose flour
1 cup (240g)
lukewarm milk
¼ cup (50g)
sugar
1 large
egg, beaten
2 Tbsp
unsalted butter, melted and cooled
1.5 tsp
dry instant yeast
1 tsp
kosher salt
2 Tbsp
plain bread crumbs
Steps
1. Start Dough
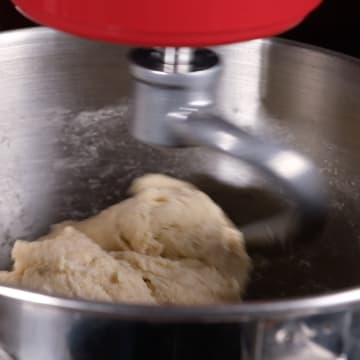
In the bowl of a stand mixer fitted with the paddle attachment (see note), combine the flour, milk, sugar, egg, butter, yeast, and salt. Mix on low speed until a sticky dough forms, about 30 seconds.

2. Knead
Switch the paddle out for the dough hook. Knead on medium-low speed until the dough is smooth and elastic, about 10 minutes. The dough will still be quite sticky.
3. First Rise
Transfer the dough to an oiled bowl. Wrap the bowl with plastic to keep the dough from forming a skin. Place the bowl in a warm area (see note) and let rise until doubled in size, about 90 minutes at 70°F (21°C).
4. Punch Down and Shape
When the dough has doubled in size, deflate the dough by punching it down. Using a bench scraper or a knife, divide the dough into 2 equal parts. Roll each dough into a log and cut into 6 individual pieces. Shape each piece of dough into a ball by rolling on a lightly floured surface. Transfer rolls to a sheet pan, spacing them evenly.
Cover the sheet pan with a damp kitchen towel and let the dough rise until doubled, about 1 hour and 15 minutes at 70°F (21°C).

5. Preheat Oven
Rack
Sous Vide Mode: Off
Steam: 100%
Temp: 375°F
Heat: Rear
6. Top with Breadcrumbs
Once the rolls have risen, sprinkle the breadcrumbs over the top of each roll.

7. Steam Bake
Rack
Let the rolls bake with steam until risen, 5 minutes.

Sous Vide Mode: Off
Steam: 100%
Temp: 375°F
Heat: Rear
00:05 Timer
8. Continue to Bake with Dry Heat
Rack
Continue to bake without steam until the rolls are golden brown, 8 to 10 minutes.

Sous Vide Mode: Off
Steam: Off
Temp: 375°F
Heat: Rear
00:08 Timer
9. Serve
Remove from the oven and let cool for at least 15 minutes before serving.

© 2013 - 2026 Anova Applied Electronics, Inc.