Key Lime Pie

Kate Itrich-Williams
September 7, 2023
By harnessing the magic of temperature control and sous vide mode in the Anova Precision Oven, you can make a silky smooth Key lime pie without any worry of curdling and overcooking. It will take longer to bake than a traditional pie, but that extra time is worth it for the resulting dreamy texture. If you’d like a faster cook that yields a pie almost as good, bump the heat up to 200°F (93°C) and cook the pie for 40 minutes.
Feel free to use either true Key lime juice (fresh or bottled) or the juice of Persian (a.k.a. standard grocery store) limes. Both varieties make a delicious pie.
If you are, like me, bothered by an excess of extra egg whites when making desserts such as this, use some of the whites to whip up a glossy, marshmallow-like Swiss meringue to decorate the pie. If you’re not, or if you’d prefer a more low-key topping, skip the meringue and serve the pie with lightly sweetened whipped cream instead.
Serves
8
Prep Time
02:55
Cook Time
03:10

5 (5)
562
Ingredients
9
graham crackers (135g)
125 grams (1/2 cup plus 2 Tbsp)
granulated sugar
70 grams (5 Tbsp)
unsalted butter, melted
1 (14-ounce) can
sweetened condensed milk
4 large
egg yolks and 2 large whites, divided (see note above)
1 Tbsp
lime zest, plus more for serving
118 ml (1/2 cup)
lime juice (see note above)
Pinch cream of tartar
Pinch kosher salt
Steps
1. Preheat the Oven
Rack
Sous Vide Mode: Off
Steam: Off
Temp: 325°F
Heat: Top, Bottom
2. Make the Crust
Crumble the graham crackers into the work bowl of a food processor. Add 25 grams (2 Tbsp) of the sugar and process until the mixture forms fine crumbs, about 30 seconds. With the processor running, pour in the butter through the feed tube. Continue to process until the mixture clumps up, about 15 seconds.

3. Add to the Pie Pan
Dump the crust mixture into a 9-inch pie pan. Use your hands to press the mixture firmly into the bottom and up the sides of the pan.

4. Bake the Crust
Rack
Bake until golden brown and set, 10 minutes. Transfer to a wire rack and let cool completely.

Sous Vide Mode: Off
Steam: Off
Temp: 325°F
Heat: Top, Bottom
00:10 Timer
5. Adjust the Oven
Rack
Open the oven door to help it cool down quickly.
Sous Vide Mode: On
Steam: 50%
Temp: 165°F
Heat: Rear
6. Make the Filling
In a medium bowl, whisk together the egg yolks, condensed milk, and 1 Tbsp lime zest. Whisk in the lime juice until smooth. Let the mixture sit and thicken while the crust cools.

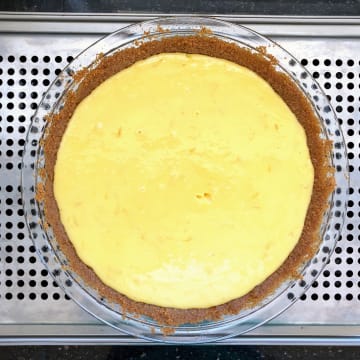
7. Pour in the Filling and Bake
Rack
Pour the filling into the cooled crust, smooth the top, then transfer to the oven and bake until its internal temperature hits 155°F (68°C), 3 hours.
Sous Vide Mode: On
Steam: 50%
Temp: 165°F
Heat: Rear
03:00 Timer
8. Cool and Chill
Let the pie cool on the counter until only slightly warm, about 1 hour, then chill for at least 1 hour in the refrigerator.
9. Make the Meringue Syrup
While the pie chills, make the topping. Fill a large saucepan with 1 to 2 inches of water. Place over medium-low heat and bring the water to a simmer. Meanwhile, whisk together the remaining 100 grams (½ cup) sugar with the egg whites, cream of tartar, and salt in a heat-proof bowl that will nestle inside the saucepan without touching the water. Place the bowl in the saucepan and cook the egg mixture, whisking gently, until the mixture reaches 165°F (74°C), 2 to 5 minutes.
10. Whip the Meringue
Pour the egg mixture into the bowl of a stand mixer fitted with the whisk attachment. Beat on high speed until the mixture is glossy and thick, about 2 minutes. Set aside until the pie has chilled. (If making more than 30 minutes in advance, cover the mixer bowl and refrigerate until ready to serve.)

11. Decorate and Serve
Use a piping bag fitted with a star tip (or a zipper-lock bag with the corner cut out) to dollop topping on the top of the pie. Top with a little additional lime zest, slice, and serve.

© 2013 - 2026 Anova Applied Electronics, Inc.